Step Seven: Rinse and Wipe Down the Surface
Once the grime is removed, it’s important to wipe away all residue. Dampen a microfiber cloth or paper towel with clean water and wipe down the entire stove top thoroughly.
Make sure no baking soda or vinegar remains, as residue can leave streaks or a dull finish if left behind.
Step Eight: Dry and Polish for a Clean Finish
After rinsing, use a dry microfiber cloth or paper towel to dry the stove top completely. This step prevents water spots and gives the surface a polished appearance.
Drying also helps you spot any remaining smudges or missed areas, allowing you to address them immediately.
Step Nine: Clean and Reinstall the Grates and Burner Caps
Now return to the grates and burner caps that have been soaking. Scrub them with a brush or scrubbing pad to remove loosened grease and food residue.
Rinse thoroughly with clean water and dry them completely before placing them back on the stove. Proper drying helps prevent rust and keeps them looking better longer.
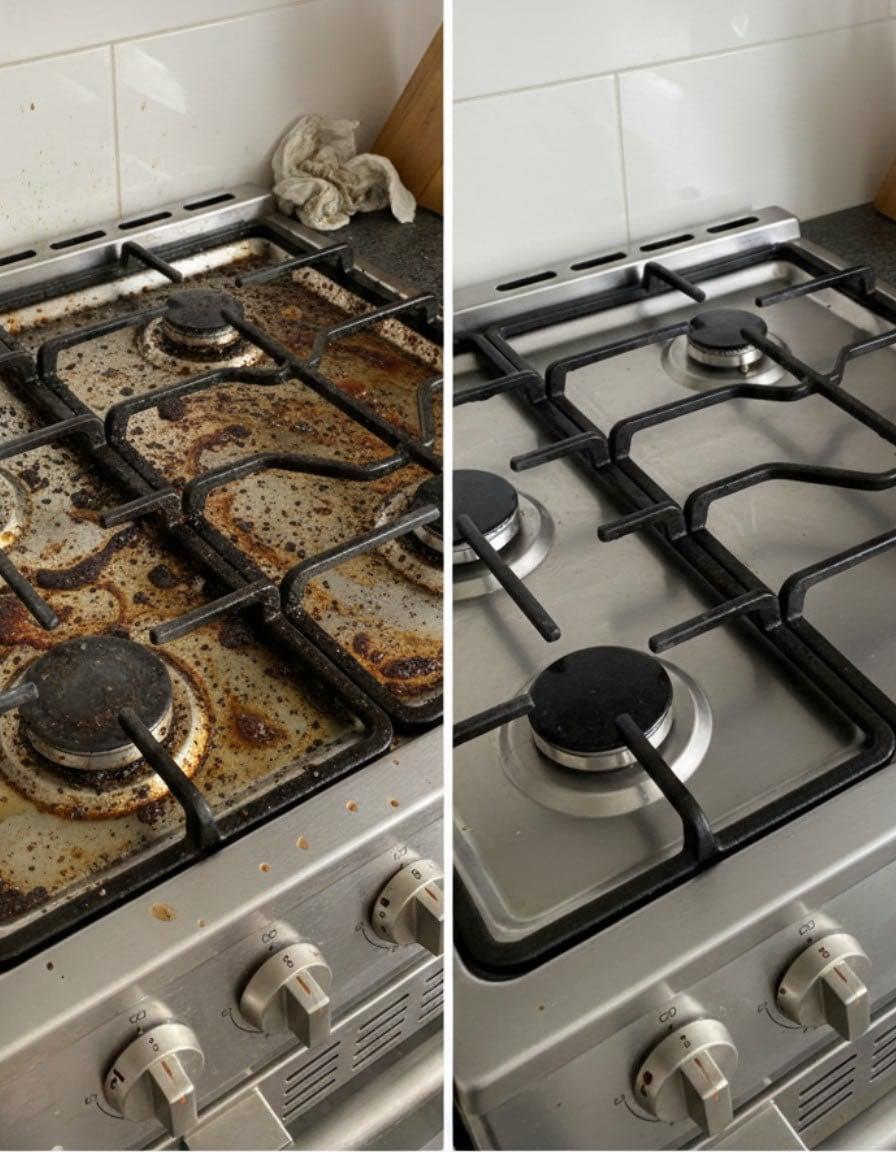
Step Ten: Step Back and Enjoy the Results
Once everything is back in place, take a moment to admire your clean stove. The transformation can be surprisingly satisfying. A sparkling stove top instantly makes your entire kitchen feel cleaner and more inviting.
How to Maintain a Clean Stove Top Daily
Deep cleaning is important, but daily habits make all the difference. Simple maintenance can prevent heavy buildup and save you time in the long run.
Easy Maintenance Tips
-
Wipe spills as soon as the stove cools
-
Use a damp cloth after cooking
-
Clean burner grates weekly
-
Avoid letting grease sit overnight
-
Use splatter guards when cooking
These small habits can dramatically reduce the need for intense scrubbing sessions.
Common Stove Top Cleaning Mistakes to Avoid
Publicité